The key to creating an interesting bonsai is an understanding of how trees deal with damage, how they repair themselves, and how they continue living for thousands of years in spite of everything the environment throws at them.
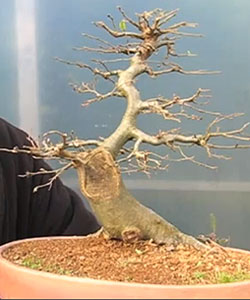
Here we have an English Hornbeam bonsai, also known as Carpnus betulus, that has an ugly cut in the middle of the trunk. A lot of bonsai enthusiasts wouldn’t know what to do with it. In this post, you will learn fast and easy fixes for that kind of problem.
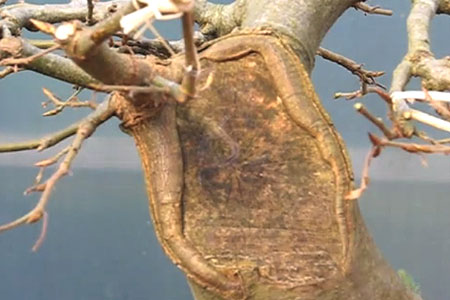
Looking closely at the cut, you can see that it is absolutely flat. There are also visible saw marks where the original trunk was removed. The scar has been healing for a few years now.
The callus tissue has rolled back nicely and there is a sharp dry back around the edge. For those reasons, this is a perfect candidate to be hollowed out. The callus will gradually roll into the hollow that we are about to make and it will look very natural.
At the base, as you can see, there is no callus tissue at all. That is because there is no sap flow there. The callus tissue develops only when the sap goes past the cut. We are going to extend this cut down and make it slightly larger and at the same time hollow it out to make the tree look more interesting and natural.
Items you will need:
- Makita Carving Tool
– I use Makita which is perfect for working on bonsai. Operation is super smooth and ergonomics are very comfortable.
- Diamond Tip Carving Burr
– This 120-piece set offers 30 profiles in four grits, 150, 240, 400, and 600, so you can progress from rapid cutting to final finishing cuts with the same profile.
- Sharp knife
– You can use any knife.
- Wire brush
– This will be used to smooth out the surface and get rid of all small wood fibers.
- Wood stain
– This is a dark brown wood stain.
Here is a step-by-step video.
Step 1: Clean up the edges
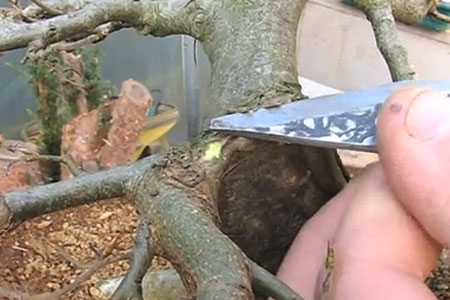
The first thing we want to do is to remove the old bark around the edge of the callus tissue. The bark is completely dead on the edge. Remove the dead bark with a sharp knife till you see a green layer underneath.
Step 2: Clean up and extend the cut
After cleaning the bark around the edges, start removing the wood in the middle. When removing the wood, be careful not to damage the bark around the cut. Use an electric bonsai carving tool to start removing the wood.
At this point, you can see the difference in color between the wood that is alive and the wood that is dead. The lighter color wood is a sap wood and it is still alive. The darker layers are the dead wood that can be removed.
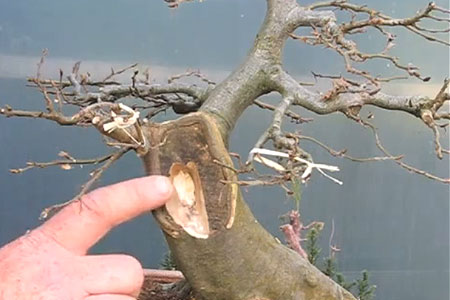
We don’t want to take out too much of the sapwood because it will restrict the sap flow up the top part of the trunk. At the same time, extend the cut down to create a more natural look.
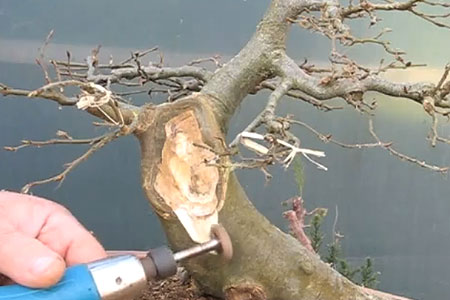
Step 3: Undercut the bark
Use much a smaller tool to undercut some of the bark, so in the future, as this callus continues to form, it will roll into this hole and that will give the tree a very natural look.
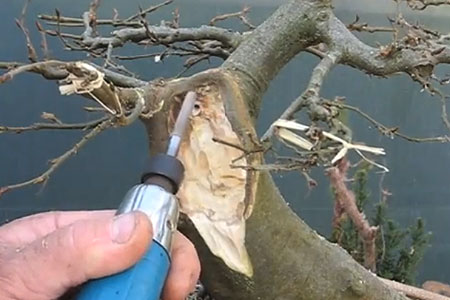
Step 4: Creating the hollow
The next step is to create a hollow. Our goal is to create some shadow and some interest. Because we have a lot of wood on the other side of the trunk, we can safely remove a good amount of wood from the cut.
Next, create detail in the dead part of the trunk, so it is not just flat wood. Intricate detail can be added in a year’s time when the wood has fully dried.
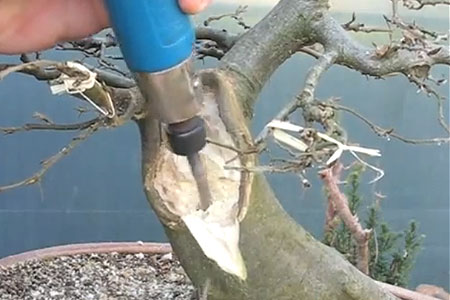
Step 5: Remove small fibers
In this step, you need to use a wire brush to get rid of the small fibers of the wood.
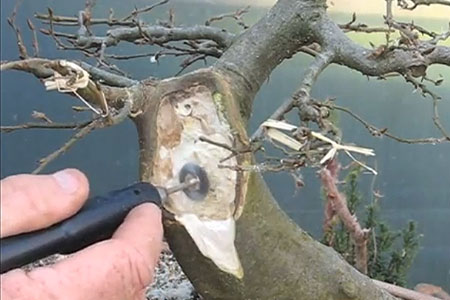
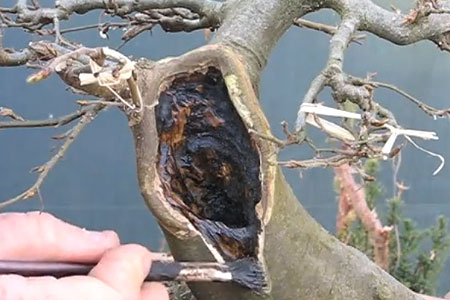
Step 6: Wood staining
As a final step, you want to stain the wood. Use a very dark brown stain. Don’t worry, it won’t harm the tree. Since we made a hollow here, it will attract some of the water. Any rot that happens in the hole will not affect the live part of the tree.
Therefore, the trunk will not collapse. It is a perfectly natural situation for this type of material. Using a small brush apply one coat of dark brown stain.
You can buy it at any Home Depot store. The staining might look severe right after application, but it will look much better after it dries out.
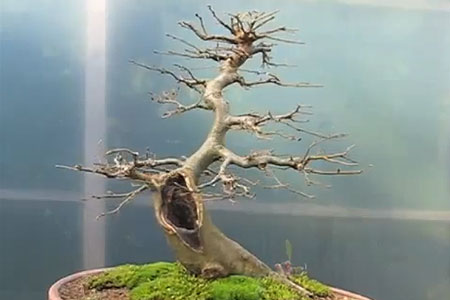
Final Result
This was a simple and quick fix. Now the tree looks much more interesting and inspiring.
Related articles:
